User Manual
Configure Supressions
Suppression Rules have different intentions:
- Support maintenance windows
- Maintain false-positives
- Report on incidents without moving them through the Incident workflow
At the time an Incident is getting created, the Alert Manager will check against matching Suppression Rules. If the suppression is successful, the Incident will be created with status suppressed and won't show up by default on the Incident Posture dashboard. Further, only the incident_suppressed event will be fired to handle Notifications.
Add Suppression Rules
- Open Settings -> Suppression Rules in the Alert Manager
- Click Add Suppression Rule to add a new collection of Suppression Rules
- Add a title and a description
- Select a rule type. Note: The rule type doesn't have any effect to the functionality, it is only supposed for documentation.
- Specify the scope of this rule
- The scope defines for which saved searches the Suppression Rules will compared against. You can use wildcards (
*), one or many times, to specify a variable scope. - Example:
alert_*will match any alert name beginning with alert_foo_*_barwill match foo_test_bar and foo_hello_world_bar
- Click Save
- Click on the name of the rule collection to switch to the Suppression Rule Editor
- Add a field name using the
$result.fieldname$ - Use
_timeto use the current timestamp (UNIX epoch timestamp) - Select a condition
- Add a value which will be compared against the value from the field
- If you selected
_timeas a field, make sure to compare against a valid UNIX epoch timestamp - Add as many rules as you want
- Click Save to add the new rules at the bottom right corner
Important: All of the rules specified in a rule collection must be true in order to have a valid suppression.
Verify Suppressions
Suppressed incidents can be reviewed in the Incident Posture dashboard
- Select a valid timerange and Suppressed as status filter option
- Expand the row of an incident by clicking the > icon in the i column.
- The incident history shows an entry containing the name of the suppression rule collection responsible for the suppression
Auto Suppression
If you enabled Auto-resolve incidents on adding new matching suppression rules in the Custom Alert Action parameters on your alert, the Alert Manager scheduler will auto-resolve matching Incidents after the rule has been added. Incidents will be turned into the status auto_suppressed_resolved. If this option is disabled only new matching Incidents get suppressed.
Use External Workflow Actions
- On the incident posture dashboard, click on the External Workflow Action button

- The Execute External Workflow Action -windows will open
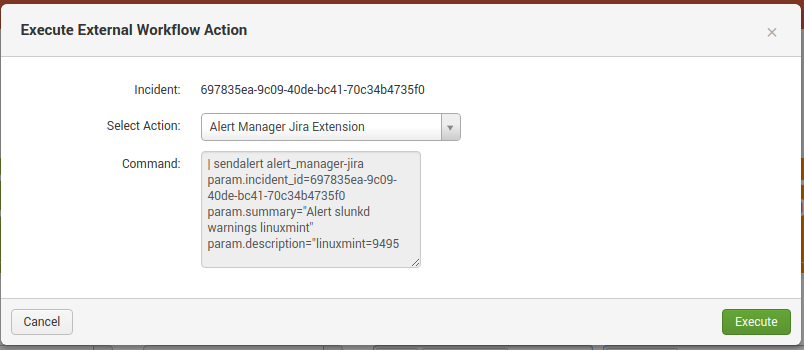
- Select the Action
- (Optional) Check the command to be executed
- Execute the action
- Alert Manager will update the history with the action
Quick assign
- To assign an incident to the current user, press the quick assign button

Manual Incident Creation
It is possible to manually create an incident. Click the New Incident button on the top right.
A form will open.
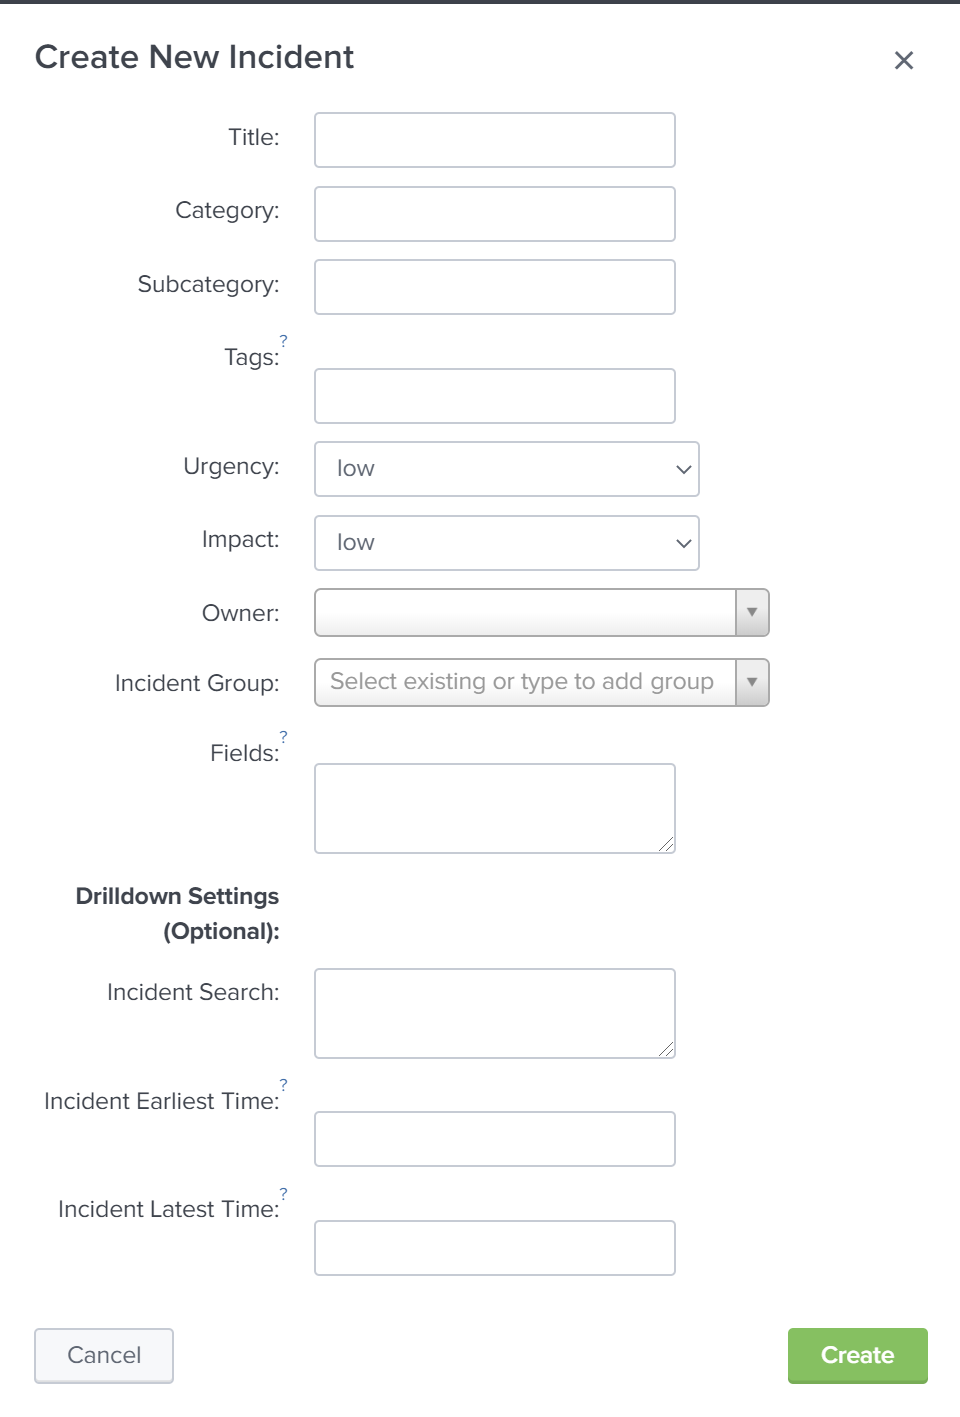
Fill in the values accordingly. Note that you can add synthetic fields in key="value" format to the new incident (one value per line).
Optionally add a drilldown search. The time format has to be in yyyy-mm-ddTHH:MM:SS.sss(+)hh:mm format or epoch time.
Incident Grouping
Incident can be grouped under the edit incident panel. Add incident to an existing group or add a new one.
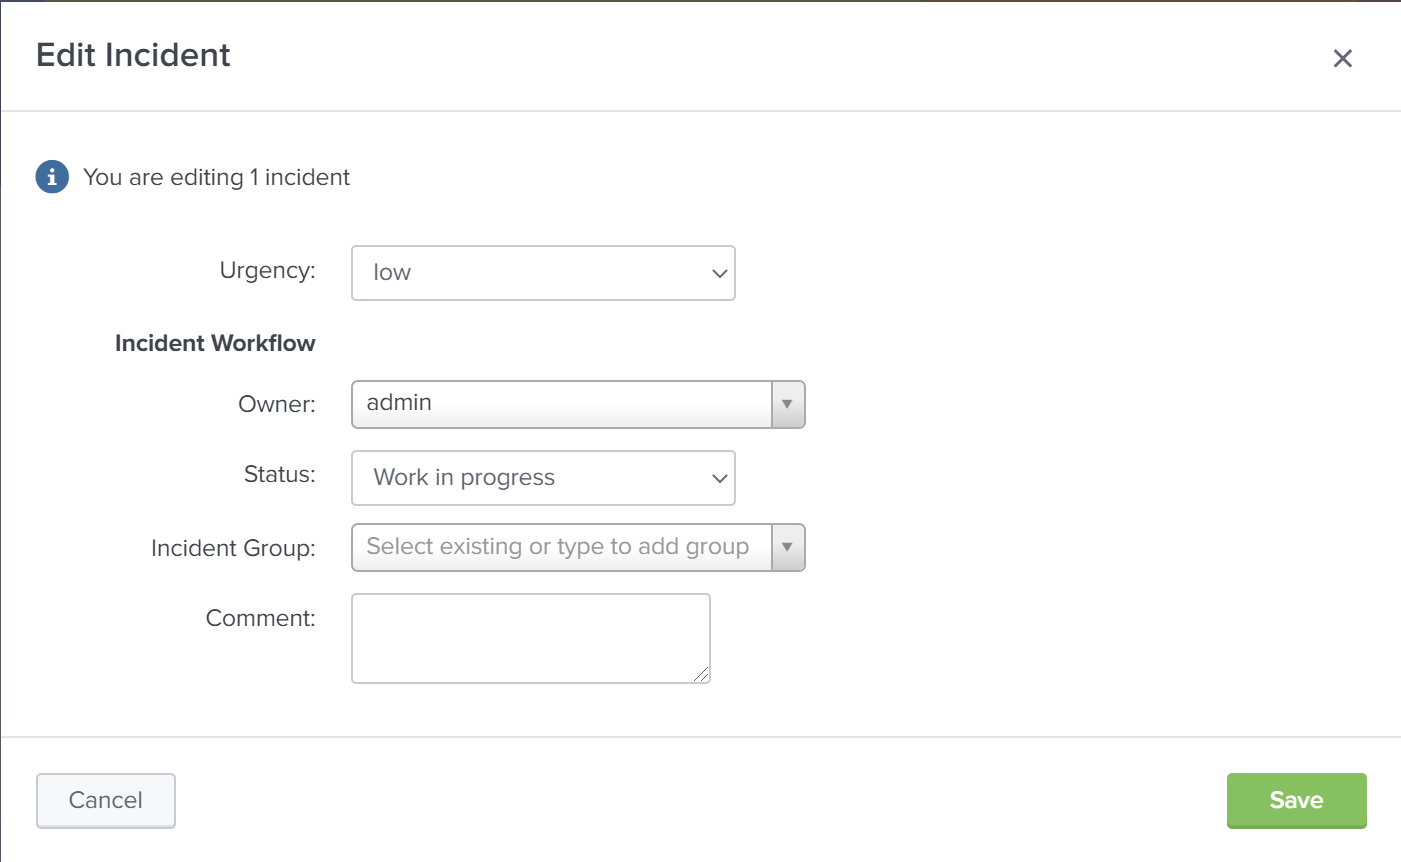
Note: Currently, it is not possible to change group names or delete groups
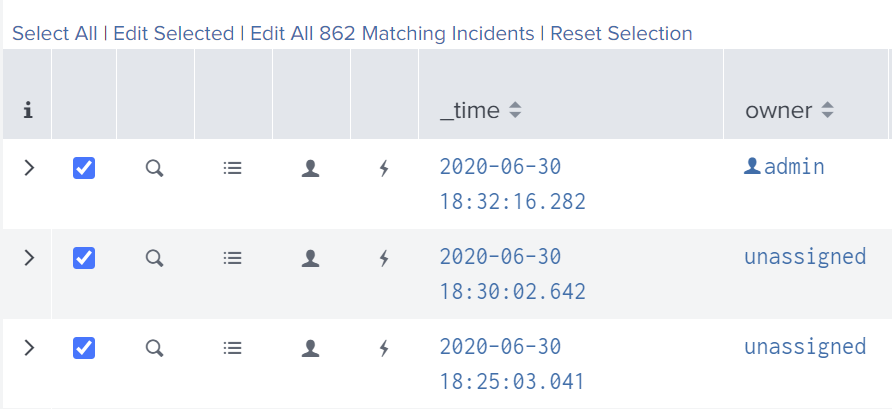
Bulk Edit
Multiple Incidents can be edited at the same time.